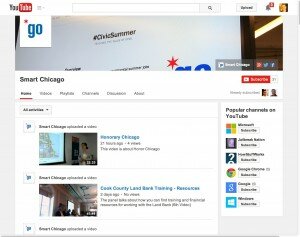
Smart Chicago YouTube Page
As part of our Youth Led Tech Program, we’re teaching various classes on digital skills. We’ve open sourced our curriculum through a series of blog posts. The overall goal of the program is to have youth create their own WordPress sites. In this lesson, we go over how to use YouTube and Google Hangouts to add videos to our blogs.
Over the last few years, we’ve created a lot of blog posts covering a variety of topics – which ends up being a lot of words. While words are great for conveying ideas, when you’re trying to explain an action or demonstrate a site it’s sometimes easier to show instead of tell. It’s also useful if you’re trying to show something that’s happening live.
We use a variety of tools to help bring video to our WordPress blogs. In this lesson, we’re going to show you how to use Google Hangouts to generate video. We use Google Hangouts because it’s free and we don’t need a ton of equipment to do it. To get Google Hangouts, you’ll need to create a YouTube page like so: (Note: During the class, we’ll actually do this part live.)
Now, Google Hangouts is used to do video conferencing between other people. What they don’t really advertise is that you can also broadcast your hangout live so that anyone can watch. When you do that, it will record the video and put it on your YouTube page.
YouTube allows you to conduct live streaming from it’s Google Hangout interface without any other special equipment. Do keep in mind is that you’ll want the fastest internet connection possible. The faster the speed, the higher quality the video will produce. We also strongly recommend using a wired connection using an ethernet cable – particularly at larger events. If there are too many people on the wifi, Google won’t get a good feed and it’ll end your video.
To create an event go to your channel page. You’ll notice that there’s a section called live event with a link called “create live event.” Click that and name your event. You can set the start time, end time, description and tags for the event. Once you’re ready to start your live stream – press “go live” and it will bring up the Google Hangout screen.
Once it’s up, you can press the ‘gear’ to get to the settings. While you can use your computer’s internal webcam – having an external webcam does make a significant difference in quality. (We use a Logitech HD webcam.) If you have an external microphone, you can also select that as well.
At the bottom right corner of the page, you’ll see a chain icon that says ‘links’ when you hover over it. You can use that to share your livestream through Twitter or embed the video stream inside a web post.
Once you’re ready, hit “Go Live” and the hangouts will start to stream. When you’re done, simply click the ‘End’ button to stop the broadcast.
Here’s a video to show you the process.
Once the video is finished, you can go to your YouTube Channel and find your video. You can then use YouTube’s embed feature to put the video in your blog post. Just copy and paste the embed video code. It’ll look something like this:
<iframe width=”560″ height=”315″ src=”https://www.youtube.com/embed/O6ROCaLvMnQ” frameborder=”0″ allowfullscreen></iframe>
When you put the code inside the text tab in WordPress, it’ll generate this:


