As part of our Youth Led Tech Program, we’re teaching youth digital skills. We’ve open sourced our curriculum in a series of blog posts. This particular lesson plan was adapted by Christopher Whitaker from the “Brief History of The Internet” from the Internet Society.
Introduction to How the Web Works
This module will teach students the basics of how the web works including the concept of ‘The Cloud”, the World Wide Web, DNS/Web Addresses, and how content appears in the browser.
Part One: The History of the Internet
Let’s say you wrote a really cool song on your computer. Without the internet the song would just stay on your laptop. To share it, you’d have to have somebody come over and look at your laptop – or you’d have to download it onto a floppy disk (What they had before USBs) and physically carry it over.
This is how computers used to work. And it was a bit of a problem for scientists trying to work collaboratively. Instead of shipping documents from universities on the east coast to the west coast, it would be a lot easier if one computer could just pick up a phone and call the other.
Which is exactly what they did.
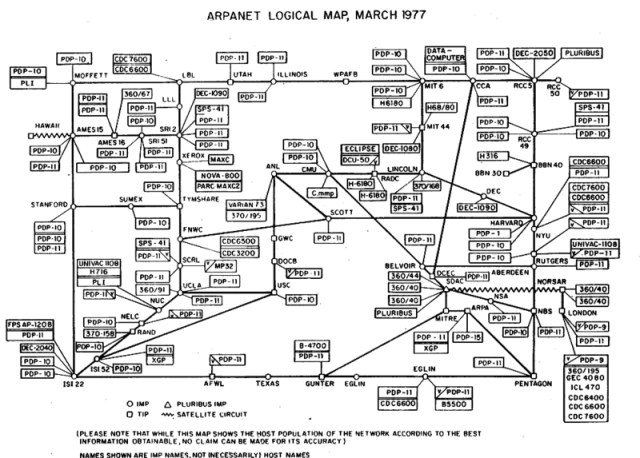
In 1965, a professor at MIT used a phone line to call up a computer at UCLA and send information back and forth. This was the first (very small) network. The government saw value with this and funded an experiment called ARPAnet. Computers from across the country were added to the network becoming a ‘web’ of computers.
But, this network had a problem. It began to grow large enough to where one computer couldn’t find another specific computer. Imagine that you’re wanting to visit a friends house for the first time, but there are no street numbers. You’d get lost pretty easily.
To solve this, Vincent Cerf and Robert Kahn created the TCP/IP protocol. TCP/IP stands for Transmission Control Protocol/Internet Protocol. It had four ground rules:
- Each distinct network would have to stand on its own and no internal changes could be required to any such network to connect it to the Internet.
- Communications would be on a best effort basis. If a packet (information) didn’t make it to the final destination, it would shortly be sent again from the source.
- Black boxes would be used to connect the networks; these would later be called gateways and routers. There would be no information retained by the gateways about the individual flows of packets passing through them, thereby keeping them simple and avoiding complicated adaptation and recovery from various failure modes.
- There would be no global control at the operations level.
The protocol also had a system for giving each device connected to the network an address called an IP Address.
Activity
Everyone take out their phones or laptop. Google “What’s my IP address”
Now, notice that if you’re not on the wifi your address is different from the one on your computer. Every internet connection has it’s own address. Every website also has an address too.
Now, go into the address bar and enter 173.252.110.27
See, it really works – that’s Facebook’s address on the Internet
DNS
The problem with the IP address is that nobody can remember all the numbers needed to get everywhere on the web.
So, they developed services called “Domain Name Servers” that give addresses like 173.252.110.27 names like “Facebook.com”
DNS servers act like Google Maps for your computer. It works like this:
- You tell your browser that you want to go to “mikvachallenge.org”
- Your computer calls up a DNS server to ask for directions to mikvachallenge.org
- The DNS servers looks through all the addresses in all of the internet and find: 67.202.93.0
- The DNS tells your browser where to find the site. Your browser then points itself to 67.202.93.0
- www.mikvachallenge.org pops up in your browser!
Web Hosting
The other problem with the early network is that those computers had to be on and connected all the time to work. It also became hard for a lot of people to try to access the same file on a single machine all at the same time.
Could you imagine 500 people trying to call you at once? Doesn’t work that well.
The people who were building the Internet needed a way to serve the information to a lot of people at once. The answer became dedicated computers that would ‘serve’ people information called servers.
YouTube has hundreds of server room that hold thousands of cat videos. When you point your browser to the funny video of your choice, the server ‘serves’ your video to your web browser.
Not everyone has to have a server room to host their websites. Expunge.io uses a service called “Amazon Web Services” to borrow their server. (Yes, you really can order everything from Amazon.”
Conclusion
This should give you a basic idea of how the web works. There’s a lot more complexity to it, but for those interested in learning more should check out these resources.
 Last November we hosted an OpenGovChicago event on park district advisory councils. As OpenGovChicago founder Joe Germuska put it, this was part of our ongoing effort to “learn more about existing microdemocratic systems in Chicago”. More:
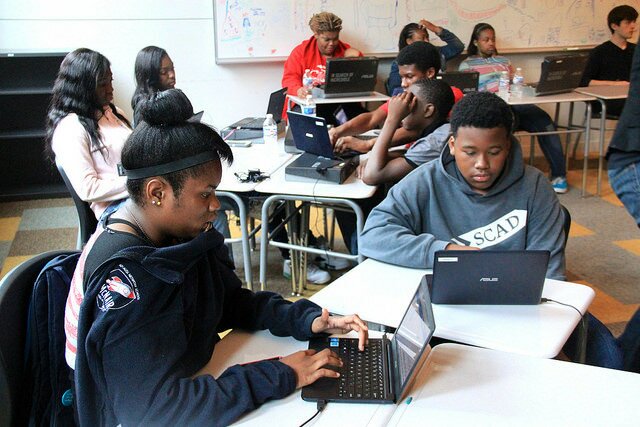 As part of our Youth Led Tech Program, we’re teaching various classes on digital skills. We’ve open sourced our curriculum through a series of blog posts. As we’ve progressed into the program, we received numerous requests from instructors and youth on activities to improve typing skills. To do this, we used a program called Typing Club which we’ll discuss below. We’ve featured this app before as part of our Connect Chicago work.
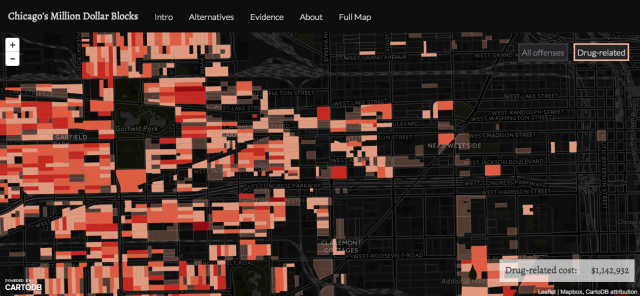 At this week’s Chi Hack Night, Dr. Dan Cooper from Adler University and Cathy Deng from DataMade presented Chicago’s Million Dollar Blocks – a site that shows how much Illinois spends on incarceration at the block level.